 by
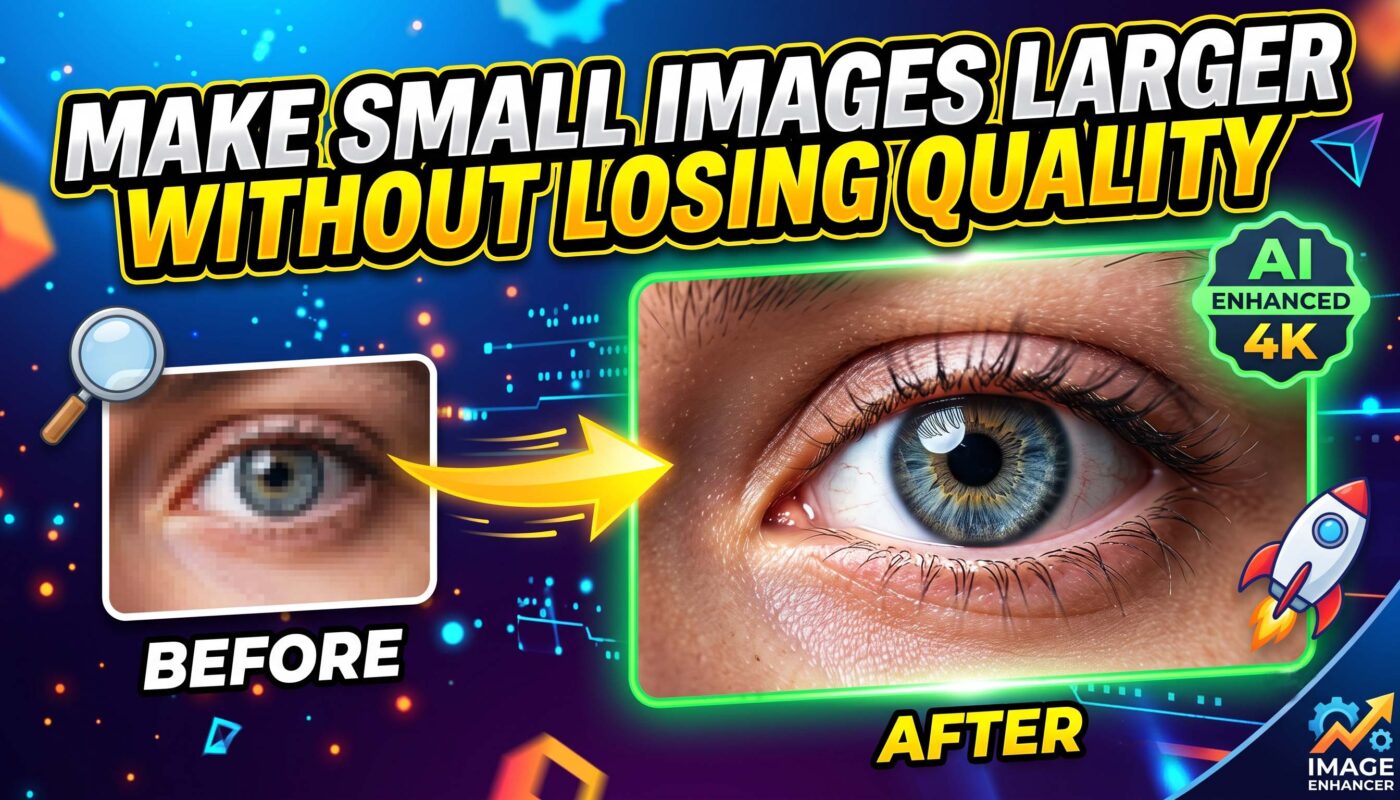
by Small images often become blurry when you make them bigger, which can be frustrating for personal or business projects. The good news is that learning how to make small images larger without losing quality is much easier today thanks to modern AI tools and advanced editing software.
Whether you want to print a photo, upload a product image, or share graphics online, using the right method helps increase image resolution while keeping details sharp. You can also enlarge image without losing quality, use an AI image upscaler, and improve image quality without needing professional skills. This guide explains simple techniques that deliver clear, high-quality results every time.
What Happens When You Make Small Images Larger?

Every digital picture is built from tiny pixels arranged in a grid. When you stretch an image beyond its original image dimensions, each pixel becomes larger. That creates visible pixelation, softer edges, and lower image clarity. This is why many photos look fuzzy after you increase image size with a basic image resizer. Understanding image resolution is the first step if you want to resize image without pixelation or create a high resolution image.
Traditional image resizing simply spreads existing pixels across a larger space. However modern AI image upscaler technology works differently. It studies textures using machine learning and deep learning before adding realistic details. Instead of stretching the original file it performs intelligent image enhancement, making it easier to upscale low resolution image, make image HD, and even restore image quality for photos that once seemed impossible to repair.
Understanding Image Resolution, Pixels, and Quality Loss
Think of a digital image like a giant mosaic. Every tiny tile represents a pixel. The more pixels your image contains the sharper it appears. Settings such as DPI, PPI, aspect ratio, and image interpolation all affect the final result. Learning the difference between resize vs upscale helps you choose the right method. It also explains why how to make a small image bigger without losing quality depends more on intelligent processing than simply dragging a corner of the image.
Can You Make Small Images Larger Without Losing Quality?

The short answer is yes. However success depends on your original image and the method you choose. Years ago software relied on basic interpolation, bicubic smoother, and simple image scaling. Those methods often created soft edges and blurry textures. Today’s super resolution AI uses AI enhancement to predict missing details. As a result you can convert low resolution to high resolution, improve photo resolution, and enlarge digital photos with much better accuracy than older editing programs.
Realistic expectations still matter. A tiny 100-pixel image cannot magically become a studio-quality poster. Even the best image quality enhancer cannot invent every missing detail. However if your original photo has reasonable detail you can achieve excellent photo quality by combining image processing, careful sharpening, light denoise, proper image optimization, and correct export settings. This combination gives far better results than enlarging an image with traditional software alone.
The Truth About AI Upscaling vs Traditional Image Resizing
Imagine restoring an old painting instead of stretching a rubber band. That is how modern AI works. Traditional resizing only enlarges what already exists. AI studies millions of similar images before rebuilding details. This approach powers many image enhancement tools and answers questions like how to enlarge an image without making it blurry, how to increase image resolution for free, how to upscale low resolution images, and how to convert low resolution image to high resolution more effectively than conventional editing methods.
Best Ways to Make Small Images Larger Without Losing Quality
Choosing the right method depends on your image and your goal. If you are editing product photos, family pictures, or website graphics, the smartest approach is to match the tool with the project. An AI photo enhancer works best for photographs, while vector graphics are ideal for logos. If you need to enlarge photo online, enlarge JPEG image, enlarge PNG image, or perform photo enlargement for social media, AI-powered software usually delivers the sharpest results with very little effort.
You should also think about where the final image will be used. A picture for a website needs different settings than one for a printed poster. Proper image compression, choosing between lossless compression and lossy compression, and selecting the correct file format all affect the final result. When you increase photo size carefully and preserve the original digital image, you can achieve excellent print quality while keeping a clean and professional appearance.
Which Image Enlargement Method Works Best for Different Image Types?
Every image has different needs. Photos usually benefit from an image upscaler with super resolution technology. Logos look better after converting them into SVG or other vector graphics because vectors stay sharp at any size. If you own a transparent logo, preserve the transparent background while enlarging it to protect the logo background. Designers also keep separate logo variations, adjust logo colors, refine logo fonts, improve logo icons, and polish logo graphics design before creating a social media logo or adding a logo watermark. Always use the correct custom dimensions instead of stretching the image manually.
| Image Type | Best Enlargement Method | Recommended Format |
| Portrait Photos | AI Image Upscaler | PNG, TIFF |
| Product Images | AI Photo Enhancer | PNG, WEBP |
| Logos | Vector Conversion | SVG |
| Website Graphics | Online Image Upscaler | WEBP, PNG |
| Print Images | Photoshop + AI | TIFF, PNG |
How to Make Small Images Larger Without Losing Quality Using AI Tools

Modern artificial intelligence has completely changed image editing. Instead of stretching existing details, AI analyzes shapes, textures, and lighting before rebuilding missing information. This process produces a much sharper high-definition image than traditional resizing. Many online platforms allow you to upscale image online, make image HD, and improve image quality within seconds. Even beginners can now create professional-looking results without advanced editing skills.
Another major advantage is speed. Most AI tools automatically improve facial details, reduce noise, and repair blurry edges. They also preserve natural textures during image restoration. If you compare an AI-enhanced image with one enlarged through ordinary software, the difference is often obvious. Fine details appear cleaner, colors remain richer, and overall photo editing becomes much easier even for someone using an online image editor for the first time.
Step-by-Step Guide to Upscaling Images with AI
Start by uploading your original image to a trusted AI platform. Choose the enlargement level that fits your project, such as 2× or 4×. Allow the software to process the image before reviewing the preview carefully. Finally, save the file using the correct JPEG, PNG, WEBP, or TIFF format based on your needs. This simple workflow answers common searches like best free AI image upscaler online, AI image enhancer free no watermark, best image enlarger for photos, increase photo quality online free, how to make blurry pictures clear, enlarge JPEG without losing quality, enlarge PNG image online, best free photo enlarger, how to improve image quality after resizing, how to enlarge old photos without losing quality, AI photo upscaler for beginners, free online image resolution enhancer, image upscaler for printing, and best AI tool to enlarge images.
How to Enlarge Images in Photoshop Without Losing Quality

Photoshop remains one of the most trusted programs for professional image editing because it gives you full control over every adjustment. If you need to How to Make Small Images Larger Without Losing Quality for printing or commercial work, Photoshop offers excellent tools to maintain detail. Features such as preserve details, bicubic smoother, and advanced image processing help produce cleaner enlargements than simple resizing methods. When paired with AI-powered features, Photoshop can create remarkably sharp results.
Begin by opening your image and selecting Image Size. Keep the aspect ratio locked to prevent distortion, then choose an appropriate resampling method. If available, enable super resolution through Adobe Camera Raw for even better results. After enlarging, apply gentle sharpening, reduce noise with denoise, and review your export settings carefully. Finally, save the file in the format that best matches your project to preserve photo quality and maximize print quality.
Best Photoshop Settings for High-Quality Image Enlargement
For most projects, use preserve details or bicubic smoother when increasing image size. Set the correct DPI for printing and maintain the original PPI whenever possible. Save photographs as TIFF or high-quality JPEG, while graphics often look better in PNG. These settings help maintain excellent image clarity and reduce unwanted artifacts during enlargement.
| Photoshop Setting | Recommended Choice | Benefit |
| Resample Method | Preserve Details 2.0 | Better edge quality |
| Resolution | 300 DPI | High-quality printing |
| Noise Reduction | Moderate | Cleaner enlarged images |
| Output Format | PNG or TIFF | Minimal quality loss |
| Sharpening | Light | Natural-looking details |
Best Free AI Image Upscaler Tools in 2026
Free AI tools have become surprisingly powerful. Many websites now allow you to enlarge photos with just a few clicks while preserving important textures and colors. Some platforms specialize in portraits, while others perform better with landscapes or product photography. The best services combine AI enhancement, image optimization, and intelligent image interpolation to produce realistic enlargements instead of blurry copies.
Before choosing a tool, compare its free limits, supported file formats, and export quality. Some platforms place watermarks on free downloads, while others limit image resolution. A reliable tool should support JPEG, PNG, and WEBP files while delivering consistent results. It should also provide simple controls that help beginners improve images without complicated editing knowledge.
Compare the Top Online Image Enlargers
The table below compares popular AI image enlargement tools that many photographers, designers, marketers, and small business owners use today.
| Tool | Free Version | AI Enhancement | Best For | Output Quality |
| Upscale.media | Yes | Excellent | Everyday Photos | Very High |
| Clipdrop | Yes | Excellent | Portraits | Very High |
| Pixelcut | Yes | Very Good | Product Images | High |
| Canva AI | Limited Free | Very Good | Social Media Graphics | High |
| Fotor AI | Yes | Good | General Photo Editing | High |
| Remini | Limited Free | Excellent | Old Photo Restoration | Very High |
Expert Tip: The best results come from combining an AI image upscaler with proper editing. Enlarge the image first, then apply light sharpening and export it in the correct format. This simple workflow produces noticeably better quality than relying on automatic enlargement alone.
Tips to Improve Image Quality Before and After Enlarging

The quality of your final image depends heavily on the original file. Always begin with the highest-quality version you have instead of downloading a compressed copy from social media. Even the best AI software performs better when the source contains clear details. Avoid repeated editing because every save may reduce quality, especially when using heavily compressed formats. A clean original gives AI more information to rebuild realistic textures and fine details.
After enlarging the image, inspect it carefully before sharing or printing. Apply only light sharpening because too much can create unnatural edges. Keep colors natural and avoid excessive filters. Save your project using the correct format for its purpose. For websites, optimize the file size without sacrificing clarity. For printing, maintain full resolution and proper export settings. These small steps often make the difference between an average result and a professional-looking image.
Simple Techniques That Prevent Blurry or Pixelated Images
Good editing habits are just as important as powerful software. Keep the original aspect ratio, avoid enlarging an image multiple times, and always preview the final result at full size. If an image still looks soft, use gentle sharpening instead of increasing contrast. A balanced workflow produces cleaner details and more natural textures while reducing visible pixelation.
| Tip | Why It Matters | Best Practice |
| Use the original file | More detail for AI | Avoid screenshots |
| Keep the aspect ratio | Prevents stretching | Lock proportions |
| Apply light sharpening | Improves clarity | Avoid over-sharpening |
| Save once | Reduces quality loss | Export the final version only |
| Choose the right format | Better quality retention | PNG or TIFF for editing |
Common Mistakes That Ruin Image Quality
Many people believe simply dragging an image corner will create a larger picture. Unfortunately, that only stretches existing pixels and rarely improves quality. Another common mistake is enlarging the same file several times. Each edit may introduce extra artifacts and soften fine details. Heavy compression, poor export choices, and low-quality source images also reduce the final result long before you notice the damage.
Another overlooked problem is using the wrong file format for the task. A highly compressed image may look acceptable on a phone screen but appear blurry on a large monitor or printed poster. Some users also apply extreme sharpening or aggressive noise reduction, hoping to recover lost detail. Instead, those adjustments often create halos, rough edges, and artificial textures. A careful editing workflow always delivers more natural and professional results.
Avoid These Errors When Enlarging Small Images
Successful image enlargement is about making smart decisions rather than quick fixes. Preserve the original file, edit only when necessary, and export the finished image once. If you need a much larger version, use AI-powered enlargement instead of repeating traditional resizing. Following these simple habits helps maintain consistent quality for websites, social media, presentations, and high-resolution prints.
| Common Mistake | Result | Better Solution |
| Stretching the image manually | Blurry appearance | Use AI upscaling |
| Saving repeatedly as JPEG | Gradual quality loss | Edit once and export once |
| Ignoring print resolution | Poor printed results | Use 300 DPI |
| Over-sharpening | Harsh edges | Apply subtle sharpening |
| Using tiny source images | Weak final quality | Start with the highest-resolution file available |
Best Image Formats for Enlarging Photos Without Losing Quality

Choosing the correct file format is just as important as selecting the right editing tool. Every format stores image data differently. PNG is an excellent choice for graphics, screenshots, and images with transparent backgrounds because it preserves fine details without heavy compression. JPEG creates smaller files, making it ideal for websites and everyday photos, although repeated editing can reduce quality. If you need professional printing, TIFF keeps almost every detail intact, while WEBP offers an excellent balance between quality and file size for modern websites.
You should also consider your final purpose before saving the image. Designers often choose SVG for logos because vector files stay perfectly sharp at any size. If you are printing large posters, product catalogs, or marketing materials, use TIFF or high-quality PNG whenever possible. For blogs and online stores, WEBP improves page speed while maintaining excellent image quality. Matching the format to your project helps you achieve sharper results without creating unnecessarily large files.
JPEG vs PNG vs WEBP vs TIFF Explained
Each format has a unique strength. JPEG works well for everyday photography, PNG is better for graphics and transparent images, WEBP improves website performance, and TIFF remains the preferred choice for professional printing. Selecting the right format protects image quality while reducing unnecessary file size.
| Image Format | Best Use | Quality | File Size |
| JPEG | Everyday photos | High | Small |
| PNG | Graphics and transparent images | Very High | Medium |
| WEBP | Websites and blogs | High | Very Small |
| TIFF | Professional printing | Excellent | Large |
| SVG | Logos and icons | Unlimited Scaling | Very Small |
Frequently Asked Questions About How to Make Small Images Larger Without Losing Quality
Expert Answers to the Most Common Questions
| Question | Answer |
| Can you make a small image larger without losing quality? | Yes. AI image upscalers can rebuild missing details far better than traditional resizing methods. |
| What is the best way to enlarge an image? | AI-powered image enlargement combined with careful editing produces the best results. |
| Can I enlarge photos for printing? | Yes. Use a high-resolution source image, set the resolution to 300 DPI, and export as TIFF or PNG for professional prints. |
| Does Photoshop increase image quality? | Photoshop can improve results with advanced resampling, sharpening, and Super Resolution features, although the original image quality still matters. |
| Which file format is best for image enlargement? | TIFF and PNG offer the best quality for editing and printing, while WEBP is excellent for websites. |
| Are free AI image upscalers good enough? | Many free tools deliver impressive results for everyday projects, although premium versions usually provide higher resolutions and more advanced features. |
| Can AI restore old or blurry photos? | Yes. Modern AI can recover details, reduce noise, and improve clarity in many old or damaged images. |
| Why does my image become blurry after resizing? | Traditional resizing stretches existing pixels instead of creating new detail, which causes blur and pixelation. |
Conclusion
Learning How to Make Small Images Larger Without Losing Quality is much easier today than it was just a few years ago. Modern AI technology, professional editing software, and smart export settings allow you to enlarge photos while preserving impressive detail. Whether you are creating product images, restoring family memories, preparing artwork for print, or designing content for social media, choosing the right workflow will always produce better results.
Instead of relying on simple resizing, focus on AI-powered upscaling, high-quality source files, and the correct image format. Small improvements at every stage add up to a significant difference in the final image. Follow the techniques shared in this guide and you will consistently create sharper, cleaner, and more professional images for both digital and print projects.
Also read:
How to Add Motion Blur in CapCut Desktop Free: A Simple Guide for Smooth, Cinematic Edits
How to Easily Reduce Audio Noise in CapCut Desktop for Free (2026 Ultimate Guide)
How to Auto Caption Videos in CapCut Desktop for Free: A Complete CapCut PC Tutorial